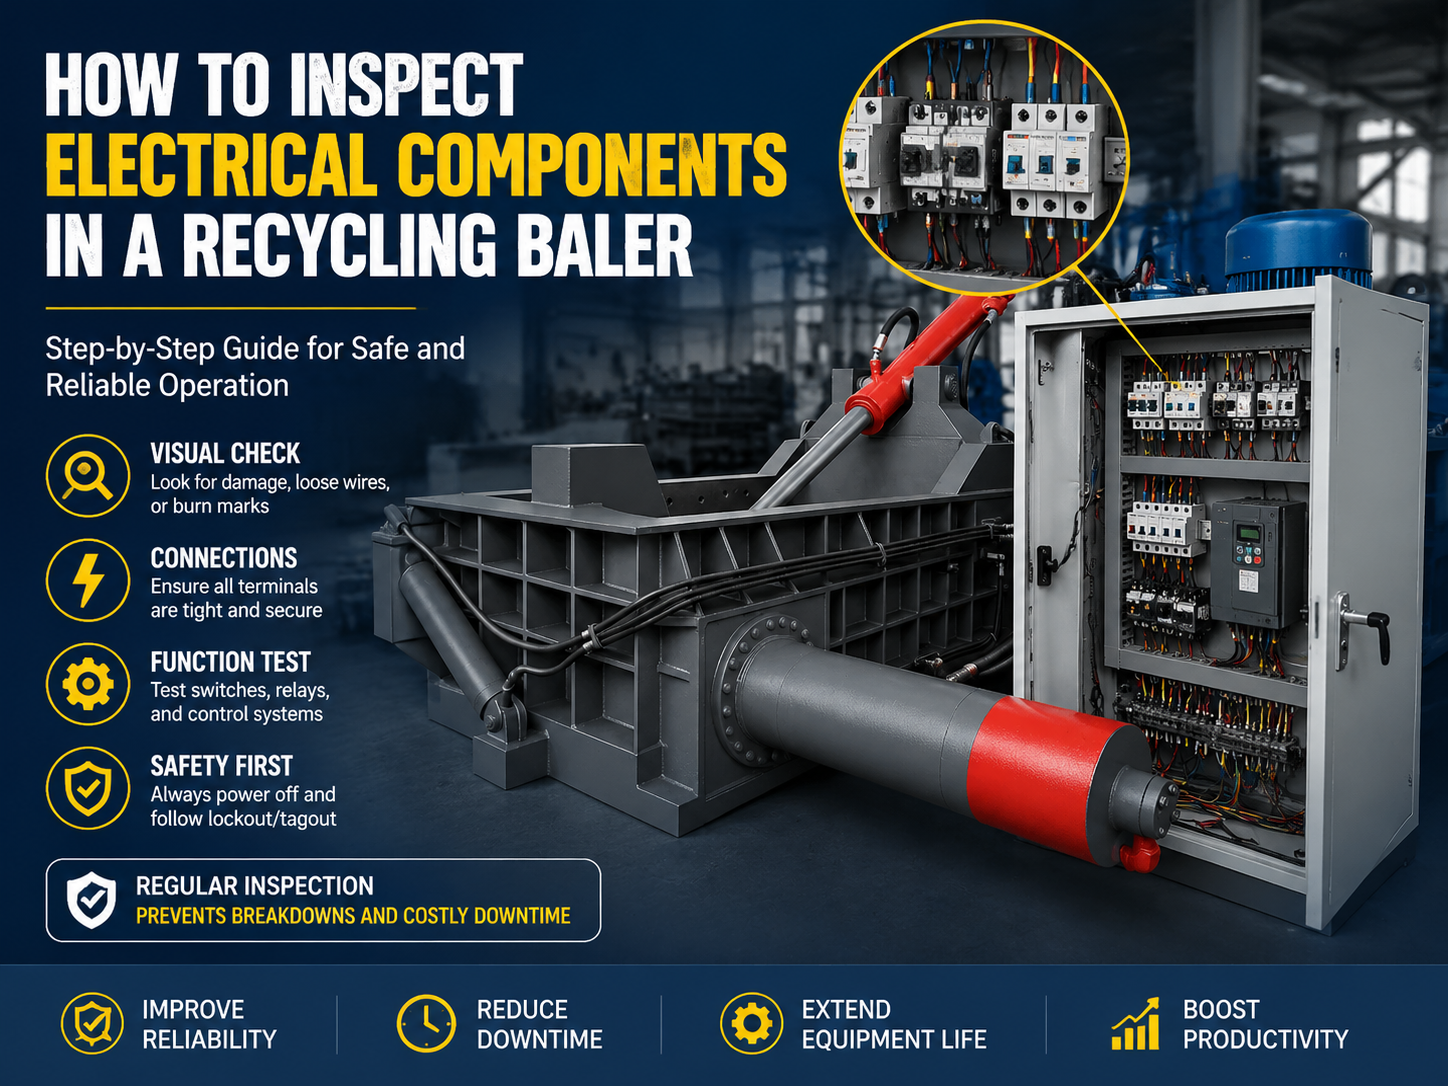
Comprehensive Guide: How to Inspect Electrical Components in a Recycling Baler
The Critical Importance of Electrical Maintenance in Recycling Balers
In the demanding world of scrap metal processing and waste management, the recycling baler stands as a cornerstone of operational efficiency. However, the reliability of these massive machines depends heavily on the health of their electrical systems. When you inspect electrical components in a recycling baler, you are not just performing a routine chore; you are ensuring the safety of your operators, preventing costly downtime, and extending the lifespan of a significant capital investment. Electrical failures in industrial environments often stem from vibration, dust accumulation, and thermal cycling, all of which are prevalent in recycling facilities.
A recycling baler operates under extreme pressure, both physically and electrically. The control system must precisely manage hydraulic valves, monitor safety interlocks, and regulate motor speeds. If a single sensor fails or a wire becomes frayed, the entire production line can grind to a halt. Moreover, electrical faults are a leading cause of industrial fires. Regular inspections allow technicians to identify hot spots, loose connections, and worn insulation before they escalate into catastrophic failures. By prioritizing electrical health, facilities can maintain a consistent throughput and avoid the high costs associated with emergency repairs and lost productivity.
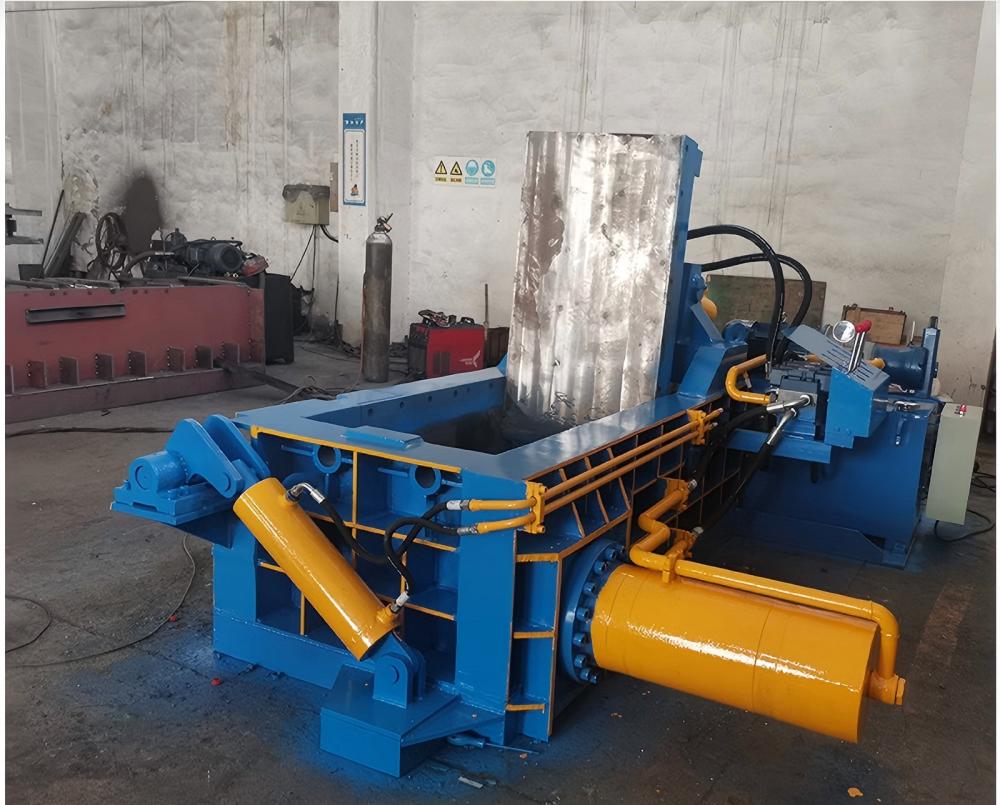
Furthermore, modern recycling balers, such as those manufactured by HARSLE, integrate sophisticated Programmable Logic Controllers (PLCs) and Human-Machine Interfaces (HMIs). These components require a specific level of care compared to traditional mechanical parts. Understanding how to navigate these systems and interpret their signals is essential for any maintenance team. This guide provides a deep dive into the systematic approach required to keep these complex electrical networks functioning at peak performance.
Finally, documentation plays a vital role in maintenance. Every time you inspect electrical components in a recycling baler, recording the findings helps in identifying trends. For instance, if a specific contactor consistently shows signs of wear every six months, it may indicate an underlying issue with motor loading or power quality. This proactive data-driven approach transforms maintenance from a reactive struggle into a strategic advantage.
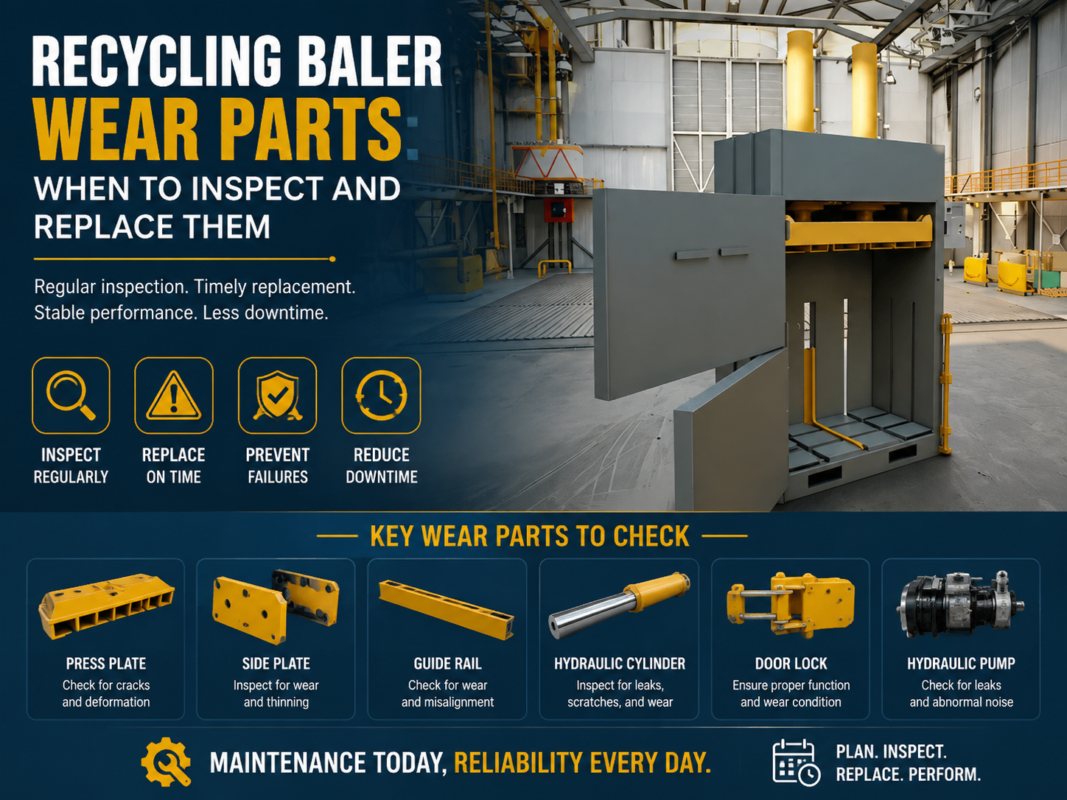
Daily Inspection Protocols for Electrical Systems
The first line of defense against electrical failure is the daily inspection. This routine should be performed at the start of every shift before the machine is fully powered up for production. The primary goal is to identify obvious physical damage or environmental hazards that could compromise the system. Start by examining the exterior of the main electrical cabinet. Ensure that all doors are tightly sealed and that the cooling fans or heat exchangers are free from dust and debris. In a recycling environment, metallic dust is particularly dangerous as it is conductive and can cause short circuits if it enters the cabinet.
Next, focus on the operator interface and emergency stop buttons. Every E-stop on the machine must be physically tested to ensure it clicks into place and cuts power to the control circuit as intended. Check the HMI screen for any active alarm messages or warning lights. Modern systems will often flag minor irregularities that haven’t yet caused a shutdown but require attention. Inspect the cables leading from the cabinet to the various motors and sensors. Look for signs of abrasion, pinching, or exposure to hydraulic fluid, which can degrade wire insulation over time.
During the daily walk-around, pay close attention to the sound and smell of the machine. Electrical issues often manifest as unusual humming, buzzing, or the distinct ozone smell of electrical arcing. If the baler features external limit switches or proximity sensors, ensure they are clear of scrap material. A piece of stray metal blocking a sensor can prevent the baler from completing its cycle, leading to unnecessary troubleshooting. These simple daily checks take less than fifteen minutes but can save hours of frustration later in the day.
Deep Dive: How to Inspect Electrical Components in a Recycling Baler
1. The Control Panel and PLC
The heart of the recycling baler is the control panel. When you perform a deep inspection, start by de-energizing the machine following proper Lockout/Tagout (LOTO) procedures, unless live testing is specifically required. Open the cabinet and use a can of compressed air or a specialized vacuum to remove any accumulated dust. Inspect the PLC modules; look for any discoloration on the casing which might indicate internal overheating. Check the status LEDs; most PLCs have indicators for power, run status, and fault conditions. If the battery backup light is on, replace the battery immediately to avoid losing the machine’s programming during a power outage.
2. Wiring and Terminal Blocks
Vibration is the enemy of secure electrical connections. Over time, the constant movement of the baler can loosen the screws in terminal blocks. Use a calibrated screwdriver to check the tightness of all connections. A loose wire creates high resistance, which generates heat and can eventually melt the terminal or cause a fire. Look for “cold” solder joints or frayed wire ends. If you notice any wires that have changed color (usually turning brown or black), it is a sign of chronic overheating, and that section of the circuit should be investigated for overloading.
3. Contactors and Relays
Contactors are responsible for switching the high-current power to the main pump motors. Because they open and close frequently under load, their internal contacts can become pitted or “welded.” Inspect the contactors for signs of carbon buildup (soot) around the housing. If the contactor makes a loud chattering noise when engaged, the coil may be failing or the contacts may be unevenly worn. Similarly, check the smaller control relays. These are often transparent, allowing you to see if the internal contacts are burnt. Replacing a $20 relay is much cheaper than diagnosing why a $5,000 motor won’t start.
4. Sensors and Limit Switches
Recycling balers rely on sensors to determine the position of the ram, the bale door, and the hopper gate. These components are often located in high-impact areas. When you inspect electrical components in a recycling baler, check the mounting brackets of all limit switches. If a bracket is bent, the switch may not trigger correctly. For proximity sensors, ensure the sensing face is clean. Use a multimeter to verify that the sensors are sending the correct signal (24V DC is common) to the PLC when triggered. If a sensor is intermittent, it is usually due to a failing cable or internal moisture ingress.
Hydraulic and Mechanical Interdependence
It is a mistake to view the electrical system in isolation. In a recycling baler, the electrical, hydraulic, and mechanical systems are deeply integrated. For example, the electrical system controls the solenoid valves that direct hydraulic oil flow. If a solenoid coil is partially shorted, it may not have enough magnetic force to shift the valve spool completely, leading to slow ram movement or erratic pressure. During your inspection, use an infrared thermometer to check the temperature of the solenoid coils. A coil that is significantly hotter than its neighbors is likely failing.
Mechanical resistance also places a direct strain on the electrical system. If the ram guides are worn or unlubricated, the motor must work harder to push the ram, drawing more current (amperage). During your electrical inspection, use a clamp-on ammeter to measure the current draw of the main motor during a full compression cycle. Compare these readings to the motor’s nameplate rating and previous inspection records. A steady increase in amperage over several months is a clear indicator of mechanical wear or hydraulic inefficiency, rather than an electrical fault itself.
Comprehensive Lubrication Plan for Longevity
While lubrication is primarily a mechanical task, it has significant electrical implications. Proper lubrication of the ram, hinges, and pivot points reduces the torque required from the electric motors. A well-lubricated machine runs cooler and draws less power. Your maintenance plan should specify the type of grease (typically a heavy-duty EP2 lithium-based grease for recycling environments) and the frequency of application. For high-volume operations, an automatic lubrication system is recommended, which itself requires electrical inspection to ensure the pump and timer are functioning.
Ensure that grease does not contaminate electrical components. Over-greasing can lead to excess lubricant dripping onto sensors or into motor housings. Grease is often non-conductive, but it traps metallic dust, which *is* conductive. This creates a “sludge” that can cause tracking and short circuits on exposed electrical terminals. Always wipe away excess grease and ensure that all electrical junction boxes are tightly sealed after performing mechanical maintenance.
Troubleshooting Signals and Error Codes
Modern balers are equipped with diagnostic tools that simplify the process to inspect electrical components in a recycling baler. The HMI will often display specific error codes. Understanding these codes is essential. For example, an “Overload Tripped” code usually points to the thermal overload relay in the cabinet. This could be caused by a mechanical jam, a phase loss in the power supply, or a motor winding starting to fail. Do not simply reset the overload; investigate the root cause.
Other common signals include flickering indicator lights, which often suggest a loose neutral wire or a failing power supply module. If the PLC enters a “Stop” or “Error” mode, it may be due to electrical noise (EMI) from a nearby VFD (Variable Frequency Drive) or a faulty ground connection. Ensure that all shielded cables are properly grounded at one end to drain away this interference. If the machine behaves erratically—such as the ram moving without a command—shut it down immediately. This often indicates a short circuit in the control wiring or a failed output module on the PLC.
Maintenance Schedule Table
| Frequency | Component | Action Required |
|---|---|---|
| Daily | Emergency Stops | Test functionality and physical condition. |
| Daily | HMI / Control Panel | Check for alarm codes and clear debris from cooling vents. |
| Weekly | Sensors & Limit Switches | Clean sensing faces and check mounting tightness. |
| Monthly | Main Cabinet Interior | Vacuum dust, check for loose terminal screws. |
| Monthly | Contactors & Relays | Visual inspection for pitting or burning. |
| Quarterly | Main Motor | Check amperage draw and insulation resistance (Megger test). |
| Annually | Full System Calibration | Verify pressure transducer accuracy and PLC battery replacement. |
Frequently Asked Questions (FAQ)
1. Why does my recycling baler keep tripping the main circuit breaker?
This is usually caused by an overcurrent condition. It could be a mechanical jam causing the motor to stall, a short circuit in the motor windings, or a failing main breaker. Check the motor amperage and inspect the power cables for damage. If the trip occurs immediately upon startup, it is likely a direct short; if it occurs after running for a while, it is likely an overload or heat-related issue.
2. How often should I replace the PLC battery?
Most manufacturers recommend replacing the PLC battery every 1 to 2 years, regardless of whether the low-battery light is on. Losing the program due to a dead battery can result in days of downtime while waiting for a technician to reload the software.
3. Can I use a regular vacuum to clean the electrical cabinet?
It is safer to use an ESD-safe (Electrostatic Discharge) vacuum or low-pressure dry compressed air. Standard household vacuums can generate static electricity, which can damage sensitive electronic components like the PLC or HMI communication ports.
4. What should I do if a sensor is covered in hydraulic oil?
Clean the sensor immediately with a non-corrosive electronic cleaner. Oil can degrade the plastic face of the sensor and attract metallic dust, leading to false readings. More importantly, find the source of the oil leak and repair it, as oil can eventually penetrate the sensor’s cable entry point.
5. Why is the HMI screen unresponsive or flickering?
Flickering is often a sign of a failing 24V DC power supply or a loose ground wire. If the screen is unresponsive, it may be a software hang (try cycling the control power) or the touch-sensitive layer of the screen may be damaged by excessive force or harsh cleaning chemicals.
Conclusion
To effectively inspect electrical components in a recycling baler, one must combine technical knowledge with a disciplined routine. By following the steps outlined in this guide—from daily visual checks to quarterly amperage monitoring—you can ensure your HARSLE recycling baler remains a reliable asset in your facility. Remember that electrical safety is paramount; always use the correct tools, wear appropriate PPE, and never bypass safety interlocks. A well-maintained electrical system is the foundation of a productive, safe, and profitable recycling operation.