Common Wear Parts in Horizontal Balers and How to Replace Them: A Comprehensive Technical Guide

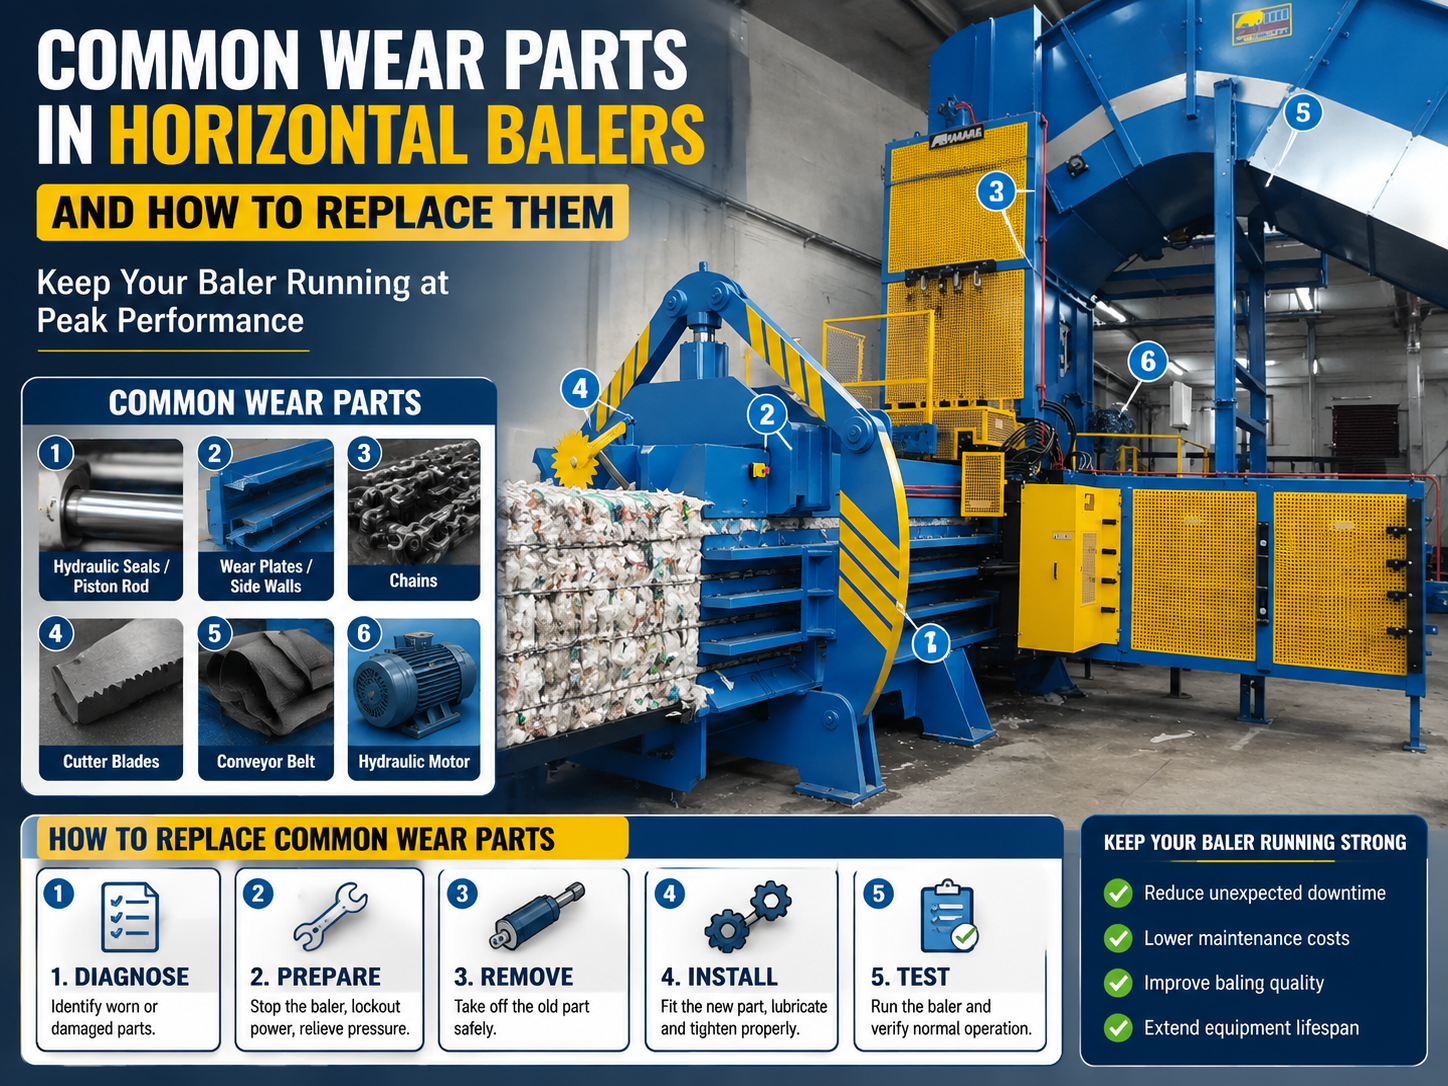
Technical Overview of Horizontal Baler Wear Components
Horizontal balers are the backbone of high-volume recycling and waste management facilities. These machines are engineered to exert massive hydraulic force to compress materials like cardboard, plastics, and non-ferrous metals into dense, manageable bales. However, the very nature of this process—involving high pressure, abrasive materials, and repetitive mechanical cycles—leads to the inevitable degradation of specific components. Understanding the common wear parts in horizontal balers replace them effectively is crucial for maintaining operational efficiency and extending the machine’s lifespan.
The primary areas of wear in a horizontal baler are the compaction chamber, the shearing mechanism, and the hydraulic system. As the ram moves forward, it creates significant friction against the floor and side liners. Simultaneously, the shear blades must cut through overhanging material, leading to edge dulling and potential chipping. If these parts are not monitored and replaced, the machine’s energy consumption increases, bale quality drops, and the risk of catastrophic structural failure rises. HARSLE emphasizes that a proactive maintenance strategy is far more cost-effective than reactive repairs.
In a typical industrial setting, a horizontal baler might process hundreds of tons of material weekly. This throughput subjects the internal surfaces to constant scouring. For instance, when baling OCC (Old Corrugated Containers), the grit and sand often found in recycled paper act as an abrasive paste, accelerating the thinning of wear plates. Similarly, the hydraulic seals are subjected to thermal cycling and pressure spikes, which eventually compromise their elasticity and sealing capabilities. Recognizing these patterns is the first step in a professional maintenance program.
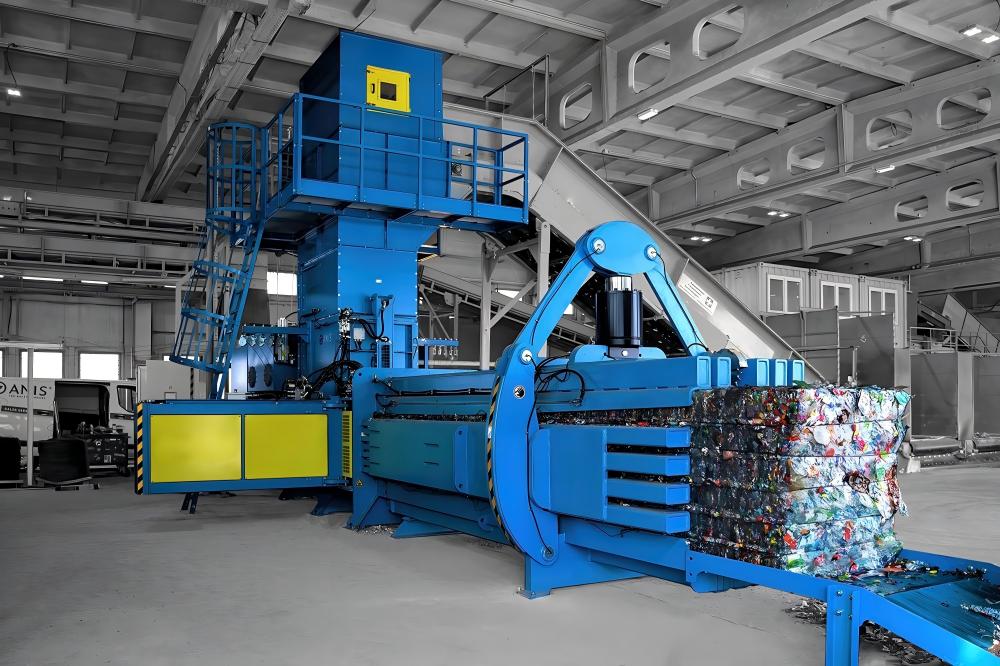
Replacing these parts is not merely a matter of swapping old for new; it requires precision alignment and an understanding of the mechanical tolerances involved. For example, replacing shear blades requires careful shimming to ensure the correct gap between the moving and stationary knives. Too wide a gap leads to material jamming; too narrow a gap causes blade clashing and breakage. This guide provides the technical depth needed to navigate these complexities safely and efficiently.
Core Parameters Influencing Component Longevity
To manage common wear parts in horizontal balers replace them schedules, one must understand the core parameters that dictate how fast these parts degrade. The first parameter is the System Pressure (PSI/Bar). Most horizontal balers operate between 2,500 and 4,000 PSI. Higher operating pressures increase the load on hydraulic seals and the structural integrity of the ram guides. If a machine is consistently pushed to its relief valve limit, the heat generated will degrade the hydraulic oil and the seals significantly faster than at nominal pressures.
The second parameter is the Cycle Time and Throughput. Wear is often measured in “strokes” or “tons processed.” A machine cycling every 30 seconds will naturally require more frequent liner inspections than one cycling every 60 seconds. Furthermore, the type of material being processed—referred to as the Material Abrasiveness Index—plays a massive role. Plastics are generally less abrasive than contaminated paper or metal scraps. Understanding the specific gravity and friction coefficient of the waste stream allows operators to predict when wear plates will reach their critical thickness.
Blade Clearance is perhaps the most critical mechanical parameter. In a horizontal baler, the shear blades typically require a clearance of 0.5mm to 1.5mm, depending on the material. As the blades wear, this gap increases. An increased gap allows material to fold rather than cut, which puts immense lateral strain on the ram and the guide tracks. Monitoring this parameter daily can prevent the need for premature replacement of the more expensive ram guides and structural supports.
Finally, Hydraulic Oil Temperature and Cleanliness are vital parameters. Oil should ideally stay between 40°C and 55°C. Excessive heat (above 65°C) causes seals to harden and become brittle. Additionally, the ISO 4406 cleanliness code of the oil determines the wear rate of the hydraulic pump and valves. Contaminated oil acts like liquid sandpaper, eroding the internal surfaces of the cylinders and valves, leading to internal leakage and reduced compaction force.
Calculation Method for Wear Part Replacement Intervals
Determining exactly when to replace parts involves both empirical observation and mathematical calculation. For wear liners, the calculation is based on the “Critical Thickness Threshold.” If a liner starts at 20mm and the manufacturer specifies a minimum thickness of 10mm before the underlying structure is at risk, and you measure a loss of 1mm every 500 hours of operation, you can calculate the remaining life: (Current Thickness – Minimum Thickness) / Wear Rate per Hour.
For shear blades, the calculation involves the “Tonnage-to-Dullness” ratio. By tracking the number of tons processed between blade flips or grinds, a facility can create a predictive maintenance schedule. For example, if a set of D2 tool steel blades consistently loses its clean cut after 2,000 tons of cardboard, the replacement or sharpening should be scheduled at 1,800 tons to avoid the increased electrical draw and mechanical stress associated with dull blades.
Hydraulic seal life can be estimated using the Arrhenius Law regarding thermal degradation, though in practical industrial terms, it is often simplified: for every 10°C increase in continuous operating temperature above the seal’s rated limit, the seal life is halved. If your baler is running hot due to a clogged heat exchanger, your seal replacement interval will drop from 5 years to 2.5 years or less. Regular thermographic inspections of the cylinders can help identify internal seal bypass before a total failure occurs.
Parameter Table: Common Wear Parts and Specifications
| Component | Typical Material | Expected Life (Hours) | Replacement Trigger | Maintenance Action |
|---|---|---|---|---|
| Shear Blades | D2 or A2 Tool Steel | 2,000 – 4,000 | Gap > 2mm or Rounded Edge | Flip, Regrind, or Replace |
| Chamber Liners | Hardox 450/500 | 5,000 – 8,000 | 50% Thickness Reduction | Weld-on or Bolt-on Replacement |
| Ram Wear Pads | Nylon/Bronze/UHMW | 3,000 – 5,000 | Excessive Ram Play (>3mm) | Shim or Replace Pads |
| Hydraulic Seals | Polyurethane/Viton | 8,000 – 12,000 | Visible Leaks or Pressure Drop | Full Seal Kit Replacement |
| Wire Tier Twisters | Hardened Alloy Steel | 1,000 – 2,000 | Missed Ties or Wire Snaps | Replace Twister Hooks/Shafts |
Common Engineering Mistakes in Baler Maintenance
One of the most frequent mistakes in maintaining common wear parts in horizontal balers replace them is the improper installation of shear blades. Many technicians fail to thoroughly clean the blade seat before installing a new or sharpened knife. Even a tiny piece of debris behind the blade can cause it to sit unevenly, leading to localized high-pressure points that cause the blade to crack or the bolts to shear under load. Always use a torque wrench to tighten blade bolts to the manufacturer’s exact specifications; under-tightening leads to vibration, while over-tightening can stretch the bolts beyond their yield point.
Another common error is ignoring the “Ram Float.” As wear pads degrade, the ram begins to tilt or lift during the compression stroke. If maintenance personnel only replace the shear blades without addressing the worn ram pads, the new blades will quickly become damaged because the ram is not traveling in a perfectly linear path. This misalignment causes the blades to strike each other or creates an uneven gap that pulls material into the side of the ram, causing a jam. Maintenance must be holistic; you cannot fix the cutting system without ensuring the guiding system is true.
Neglecting the hydraulic filtration system is a silent killer of horizontal balers. Some operators wait for a hose to burst before looking at the hydraulic circuit. However, the wear parts inside the pump and valves are much more sensitive. Using the wrong grade of hydraulic oil—such as using a standard AW46 when a high-viscosity index oil is required for high-heat environments—leads to rapid seal failure. Furthermore, failing to change the breather cap on the hydraulic reservoir allows moisture and airborne silica to enter the system, which accelerates the wear of every moving part in the hydraulic circuit.
Finally, many facilities make the mistake of using “will-fit” parts that do not meet the original equipment manufacturer (OEM) specifications. While a cheaper wear plate might look the same, if the Brinell hardness is lower than required, it will wear out in half the time, leading to double the labor costs and downtime. HARSLE recommends always verifying the metallurgy and tolerances of replacement parts to ensure they match the machine’s engineering requirements.
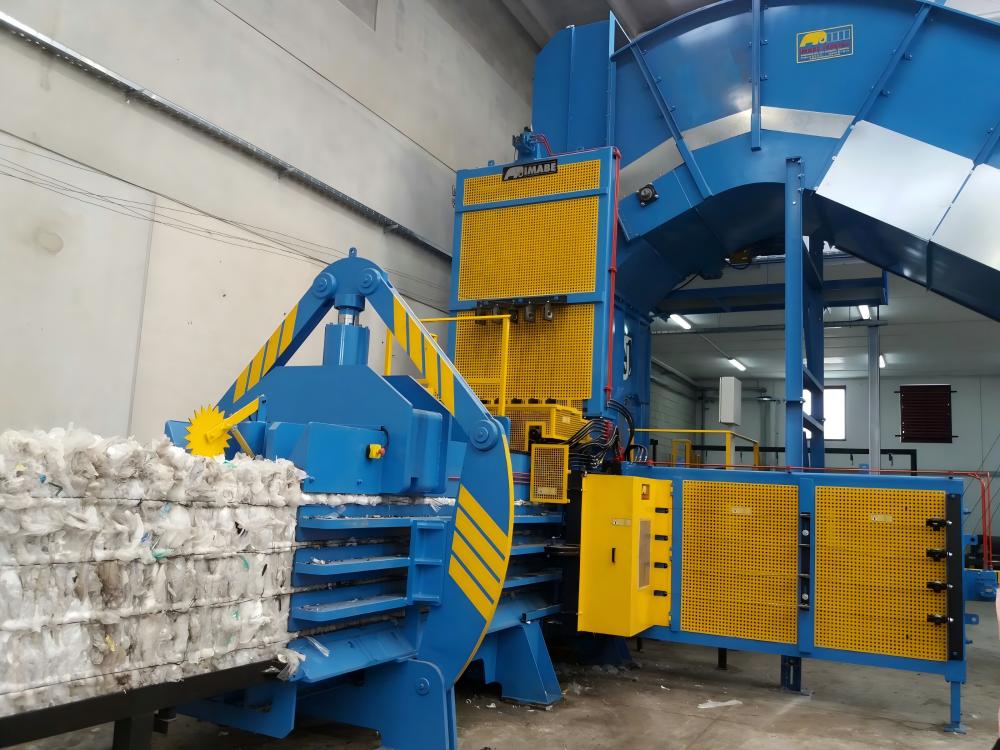
Selection Checklist for Replacement Parts
- Material Grade Verification: Ensure shear blades are made from high-carbon, high-chrome tool steel (like D2) for maximum edge retention.
- Hardness Testing: Wear liners should typically have a hardness of 400-500 HBW (Brinell). Verify this with the supplier.
- Dimensional Accuracy: Check that replacement liners have the correct countersunk hole patterns to match your baler’s frame without modification.
- Seal Compatibility: Ensure hydraulic seals are compatible with the type of fluid used (e.g., mineral oil vs. fire-resistant fluids).
- Fastener Quality: Always use Grade 8 or higher bolts for shear blades and structural liners; never reuse old bolts that have been subjected to shear stress.
- OEM vs. Aftermarket: Evaluate the total cost of ownership; OEM parts often provide better fitment and longer service life.
- Lead Time Management: Keep critical wear parts (blades, seals, twister hooks) in stock to avoid waiting weeks for shipping during an emergency.
- Surface Finish: For ram guides, ensure the surface finish is smooth to prevent premature wear of the mating nylon or bronze pads.
Step-by-Step Replacement Guide: Shear Blades
Replacing the shear blades is a high-precision task. First, follow all Lock-Out Tag-Out (LOTO) procedures to ensure the machine cannot be energized. Retract the ram to the fully open position to access the blades. Clean the area thoroughly with a wire brush and compressed air to remove all dust and debris. This is critical for safety and for seeing the bolt heads clearly.
Loosen the bolts holding the stationary blade (the one attached to the frame) first. Use a pry bar to carefully remove the blade, being mindful of its weight. Inspect the blade seat for any burrs or damage; if found, file them smooth. Install the new or rotated blade, but do not tighten the bolts fully yet. Repeat the process for the moving blade on the ram face. Once both are in place, manually (or using the maintenance jog mode) move the ram forward to check the clearance with a feeler gauge.
Adjust the clearance by adding or removing shims behind the stationary blade. Once the gap is uniform across the entire length of the blade (e.g., 1.0mm), tighten all bolts to the specified torque. It is a best practice to run the machine through several empty cycles and then re-check the torque and the gap. A properly adjusted shear system will produce clean cuts, reduce noise, and lower the amperage draw of the motor.
FAQ: Common Wear Parts In Horizontal Balers Replace Them
How often should I rotate my horizontal baler’s shear blades?
Most horizontal baler blades are four-sided, meaning they can be rotated three times before needing to be reground or replaced. Rotation should typically occur every 500 to 1,000 operating hours, depending on the abrasiveness of the material. If you notice “tails” or uncut material hanging from the bales, it is time to rotate the blades immediately.
What are the signs that the hydraulic seals need replacement?
The most obvious sign is external oil leakage around the cylinder rod. However, internal leakage is more subtle; signs include the ram drifting when the controls are in neutral, a loss of compaction force (bales are lighter than usual), or the hydraulic oil overheating quickly. If the cylinder barrel feels significantly hotter than the rest of the hydraulic system, it indicates oil is bypassing the piston seal.
Can I weld over worn liners instead of replacing them?
While “hard-facing” via welding is possible for temporary repairs, it is not recommended as a permanent solution for horizontal balers. The heat from welding can warp the underlying frame, and the resulting surface is often not as smooth or uniform as a factory-made Hardox liner. This unevenness can cause the ram to jump or vibrate, leading to further mechanical issues. Replacement is always the superior engineering choice.
Why does my wire tier keep failing?
The wire tier is a precision instrument. Common wear parts include the twister hooks, the cutter, and the needles. If the twister hooks become grooved by the wire, they will fail to release the knot properly. Similarly, if the wire guides are worn, the wire may not be positioned correctly for the twist. Regular cleaning of dust and debris from the tier mechanism is the best way to prevent premature wear of these small but vital parts.
How do I know if my ram wear pads are worn out?
Check for “ram float” or excessive play. If you can see the ram shifting side-to-side or lifting up more than 3-5mm during the compression stroke, the pads are likely worn. You can also inspect the gap between the ram and the floor liners; if it is uneven, the pads need adjustment or replacement. Ignoring this will eventually lead to the ram damaging the chamber walls.